Clubhouse clone in React
Getting Started
In this guide we will be building Clubhouse clone in React and using 100ms React SDKs by which you can have audio chats with your friends.
Our Clubhouse clone will have the following features:
- Audio Call
- Chats
- Changing Roles
Prerequisites
To follow this tutorial, you must have a basic understanding of the rudimentary principles of React. React Docs is a great way to start learning react.
Setting up Project
I have created a starter project based on CRA + Tailwind. To make things easier and to help us focus on adding the core functionality i already created all UI React Components we will be using in the project.
git clone <GIT_REPO_URL> clubhouse-clone
Now that you have cloned the repo you might see a couple of folders , a brief explanation of them:
components: has all UI components (Avatar , Usertile , Footer) with props and functions already setupicons: has all svg icons we will be using as a React Componentutils: has all utility functions we will be using
Dependencies
All dependencies that we will be using are already added to the project's package.json so doing yarn or npm install should install all our dependencies. We will be using the following 100ms React SDKs libraries.
@100mslive/hms-video-react@100mslive/hms-video
Access Credentials
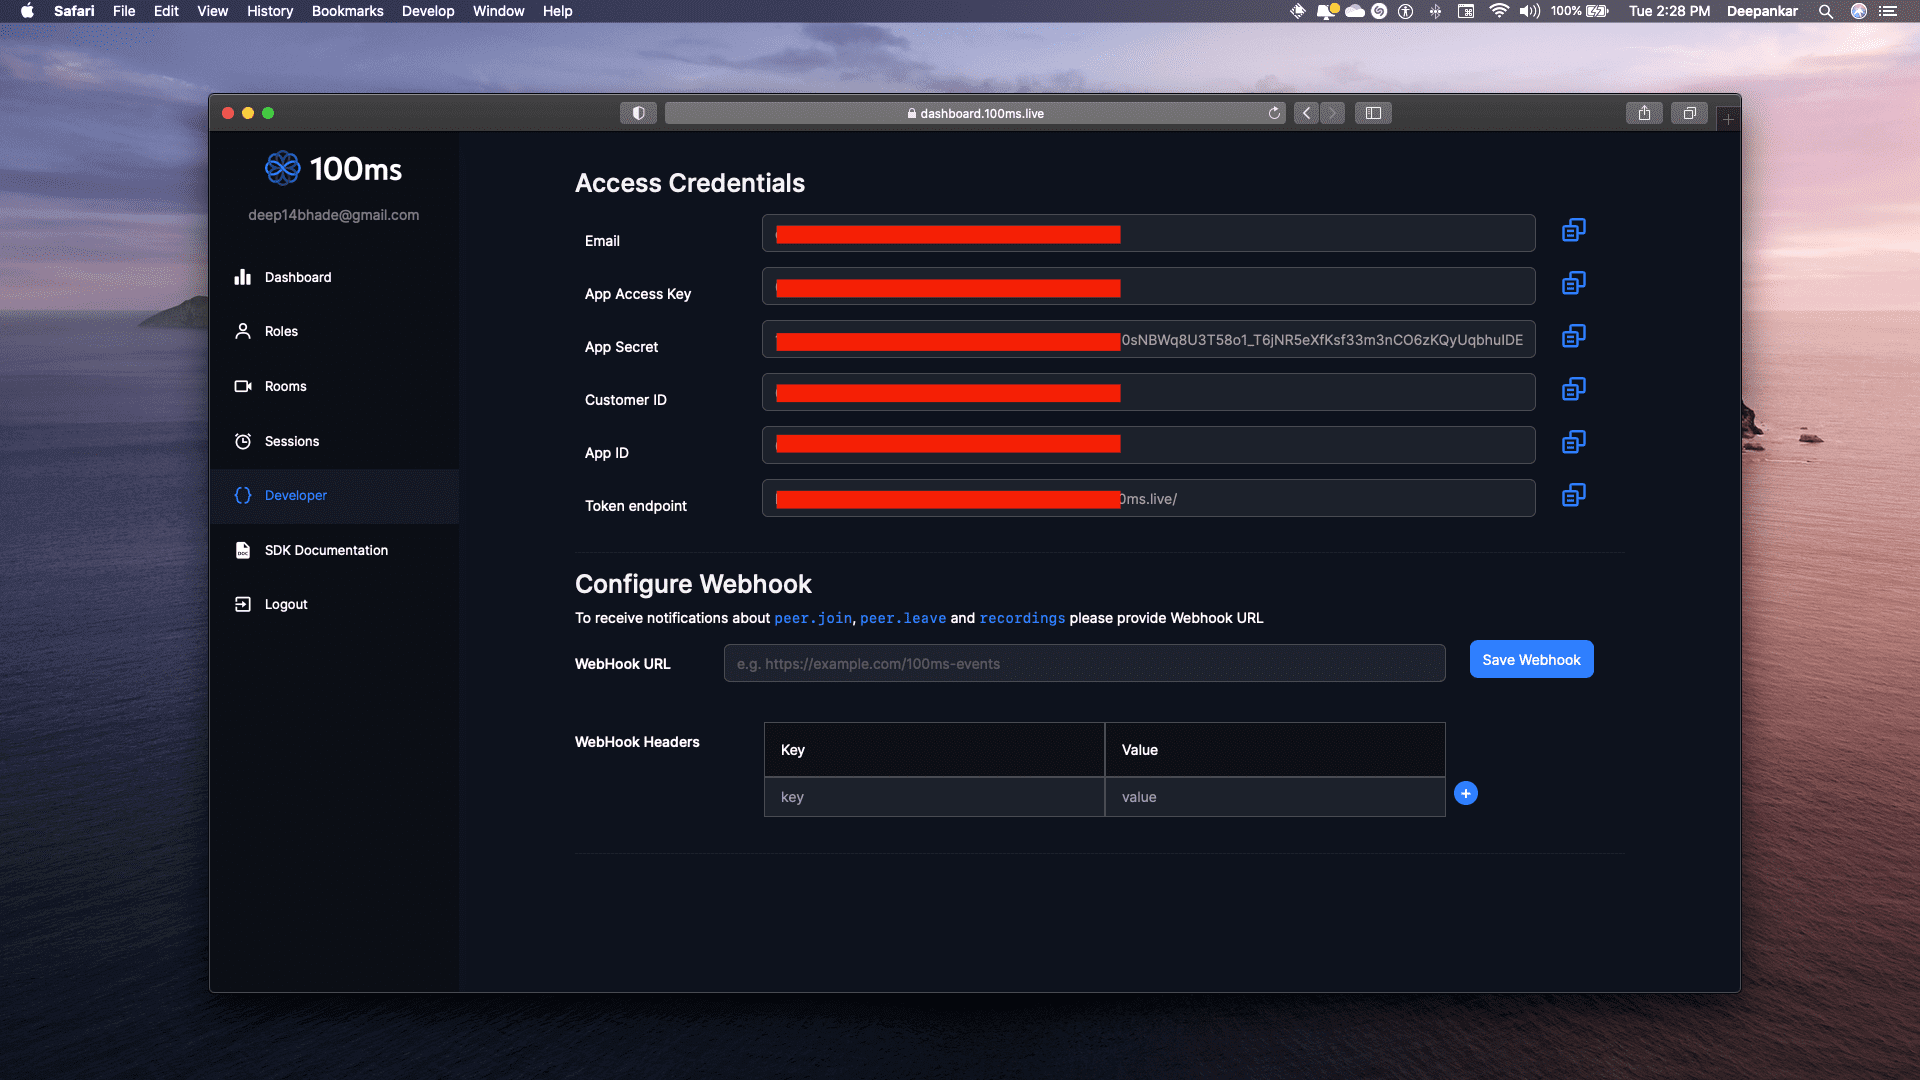
We will be needing token_endpoint & room_id from 100ms Dashboar to get these credentials you 1st need to create an account at 100ms Dashboard after your account is setup head over to the Developer Section. You can find your token_endpoint there.
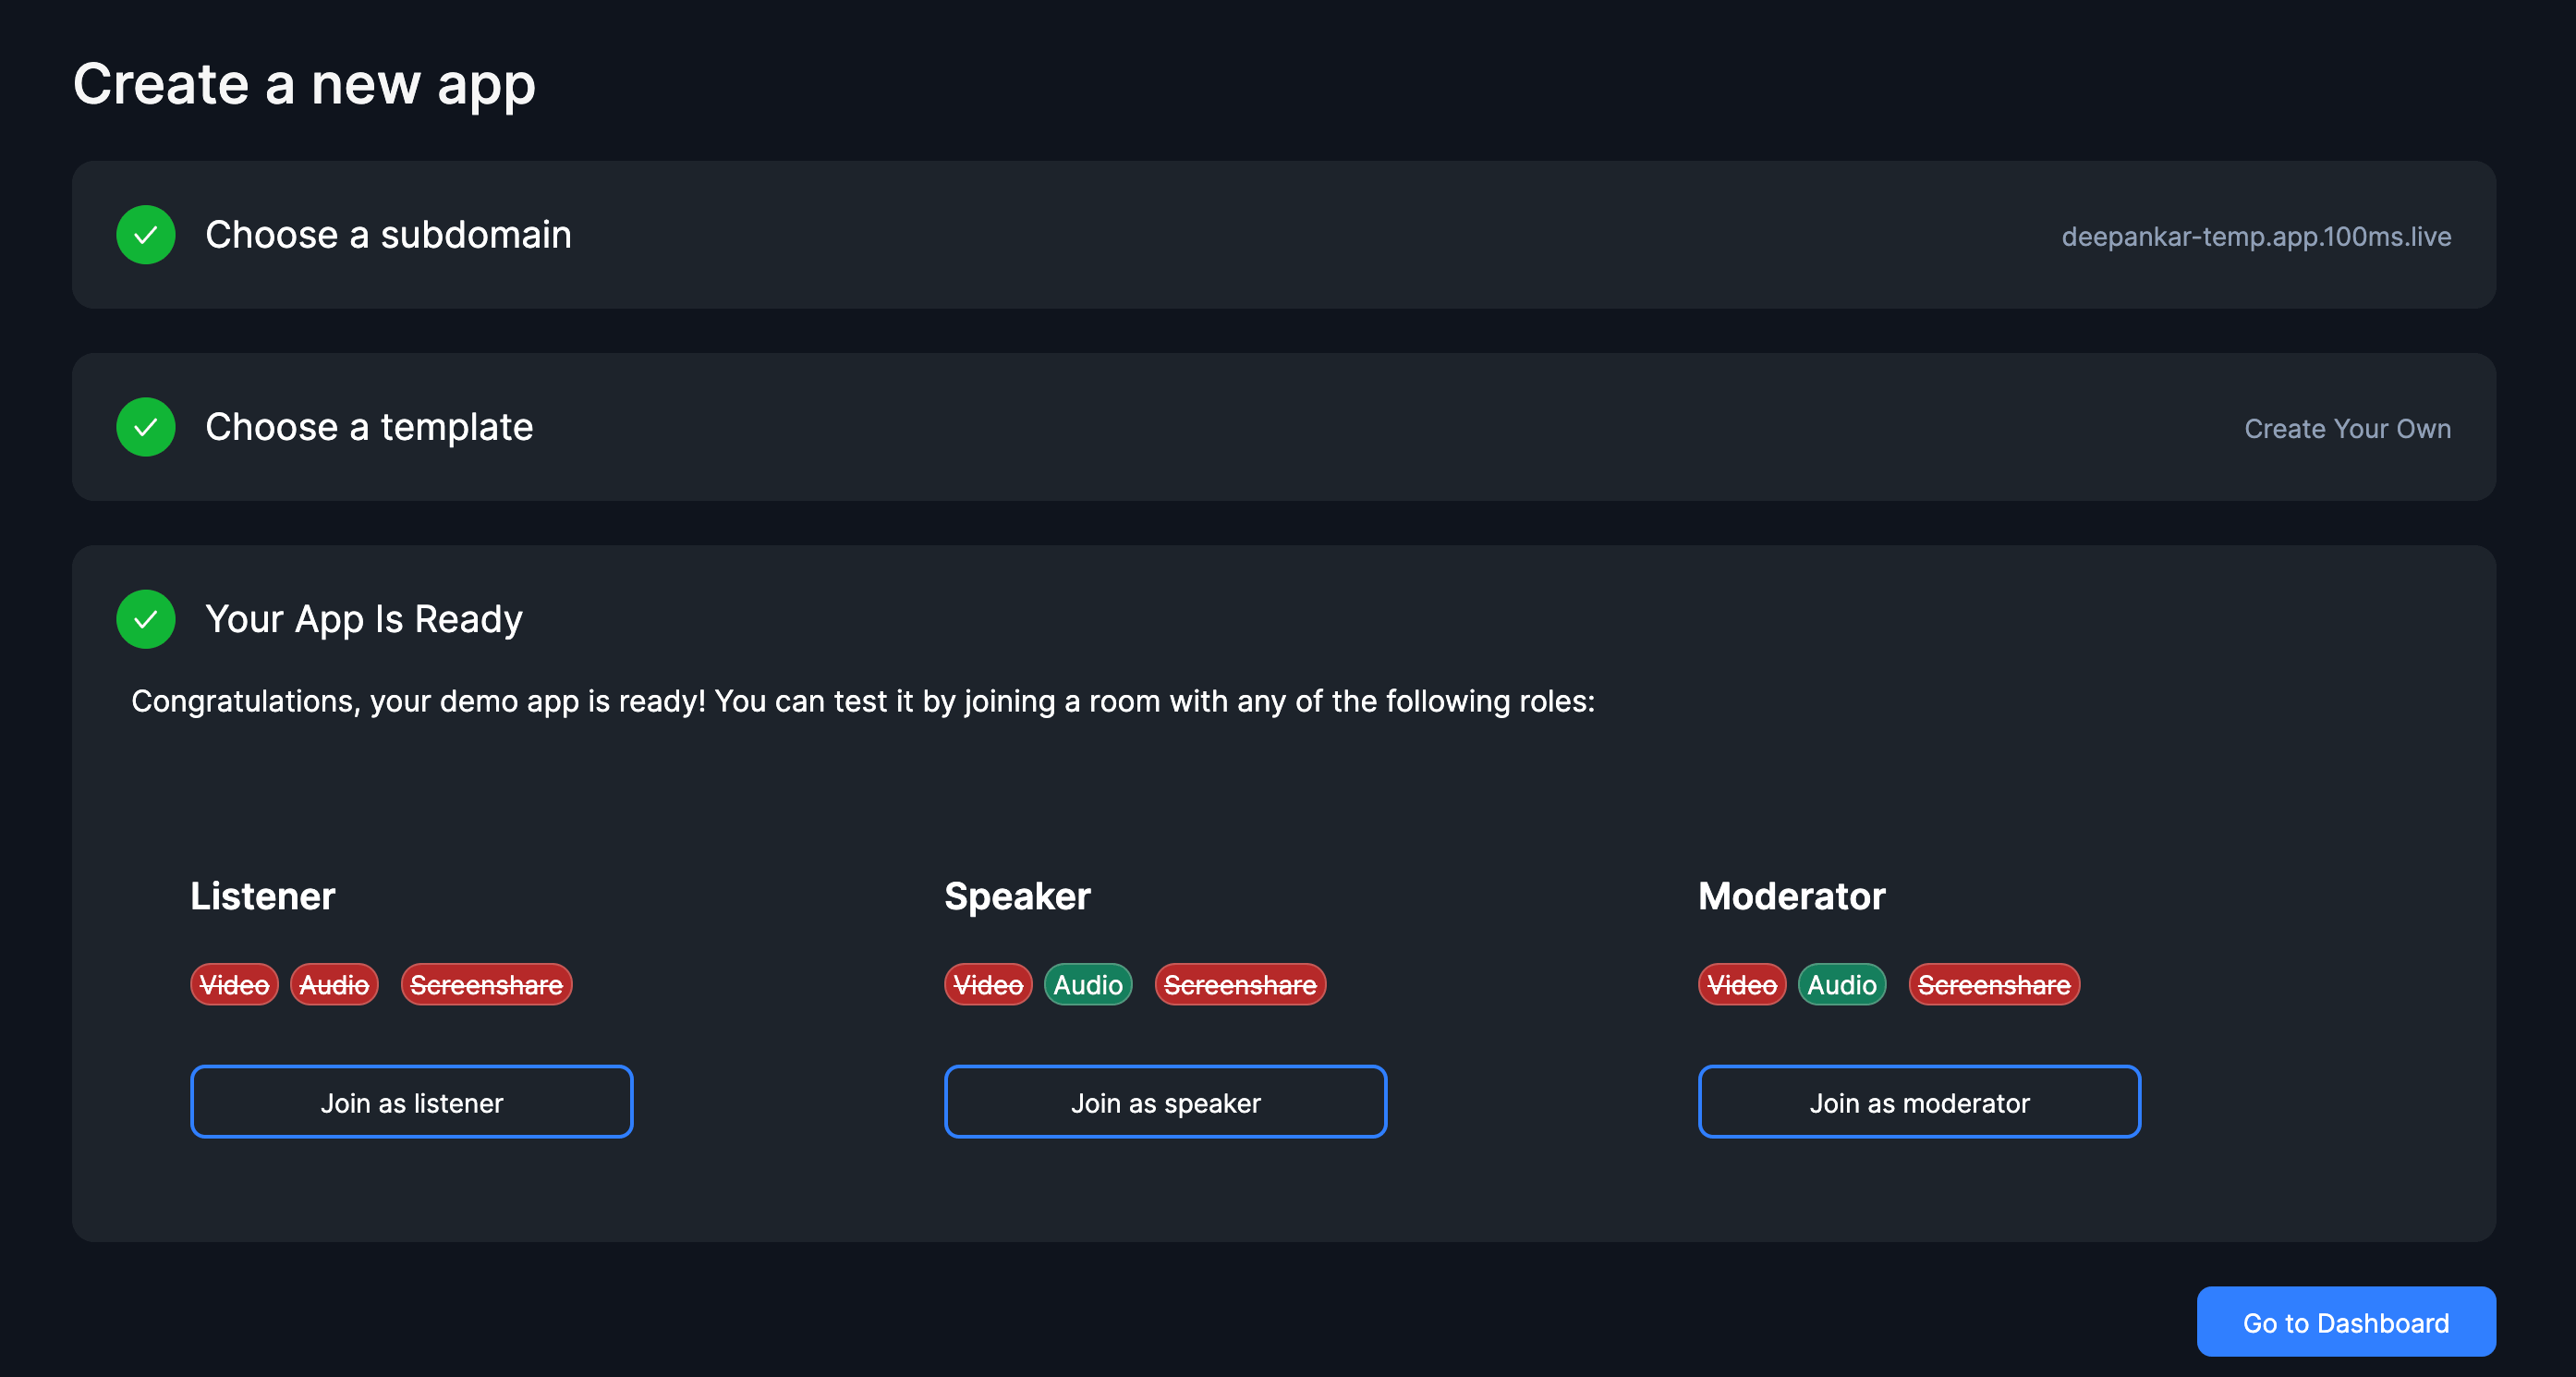
Creating Roles
Before we create a room we will create a custom app , you can find it here. Click on "Add a new App", you will be asked to choose a template choose "Create your Own".
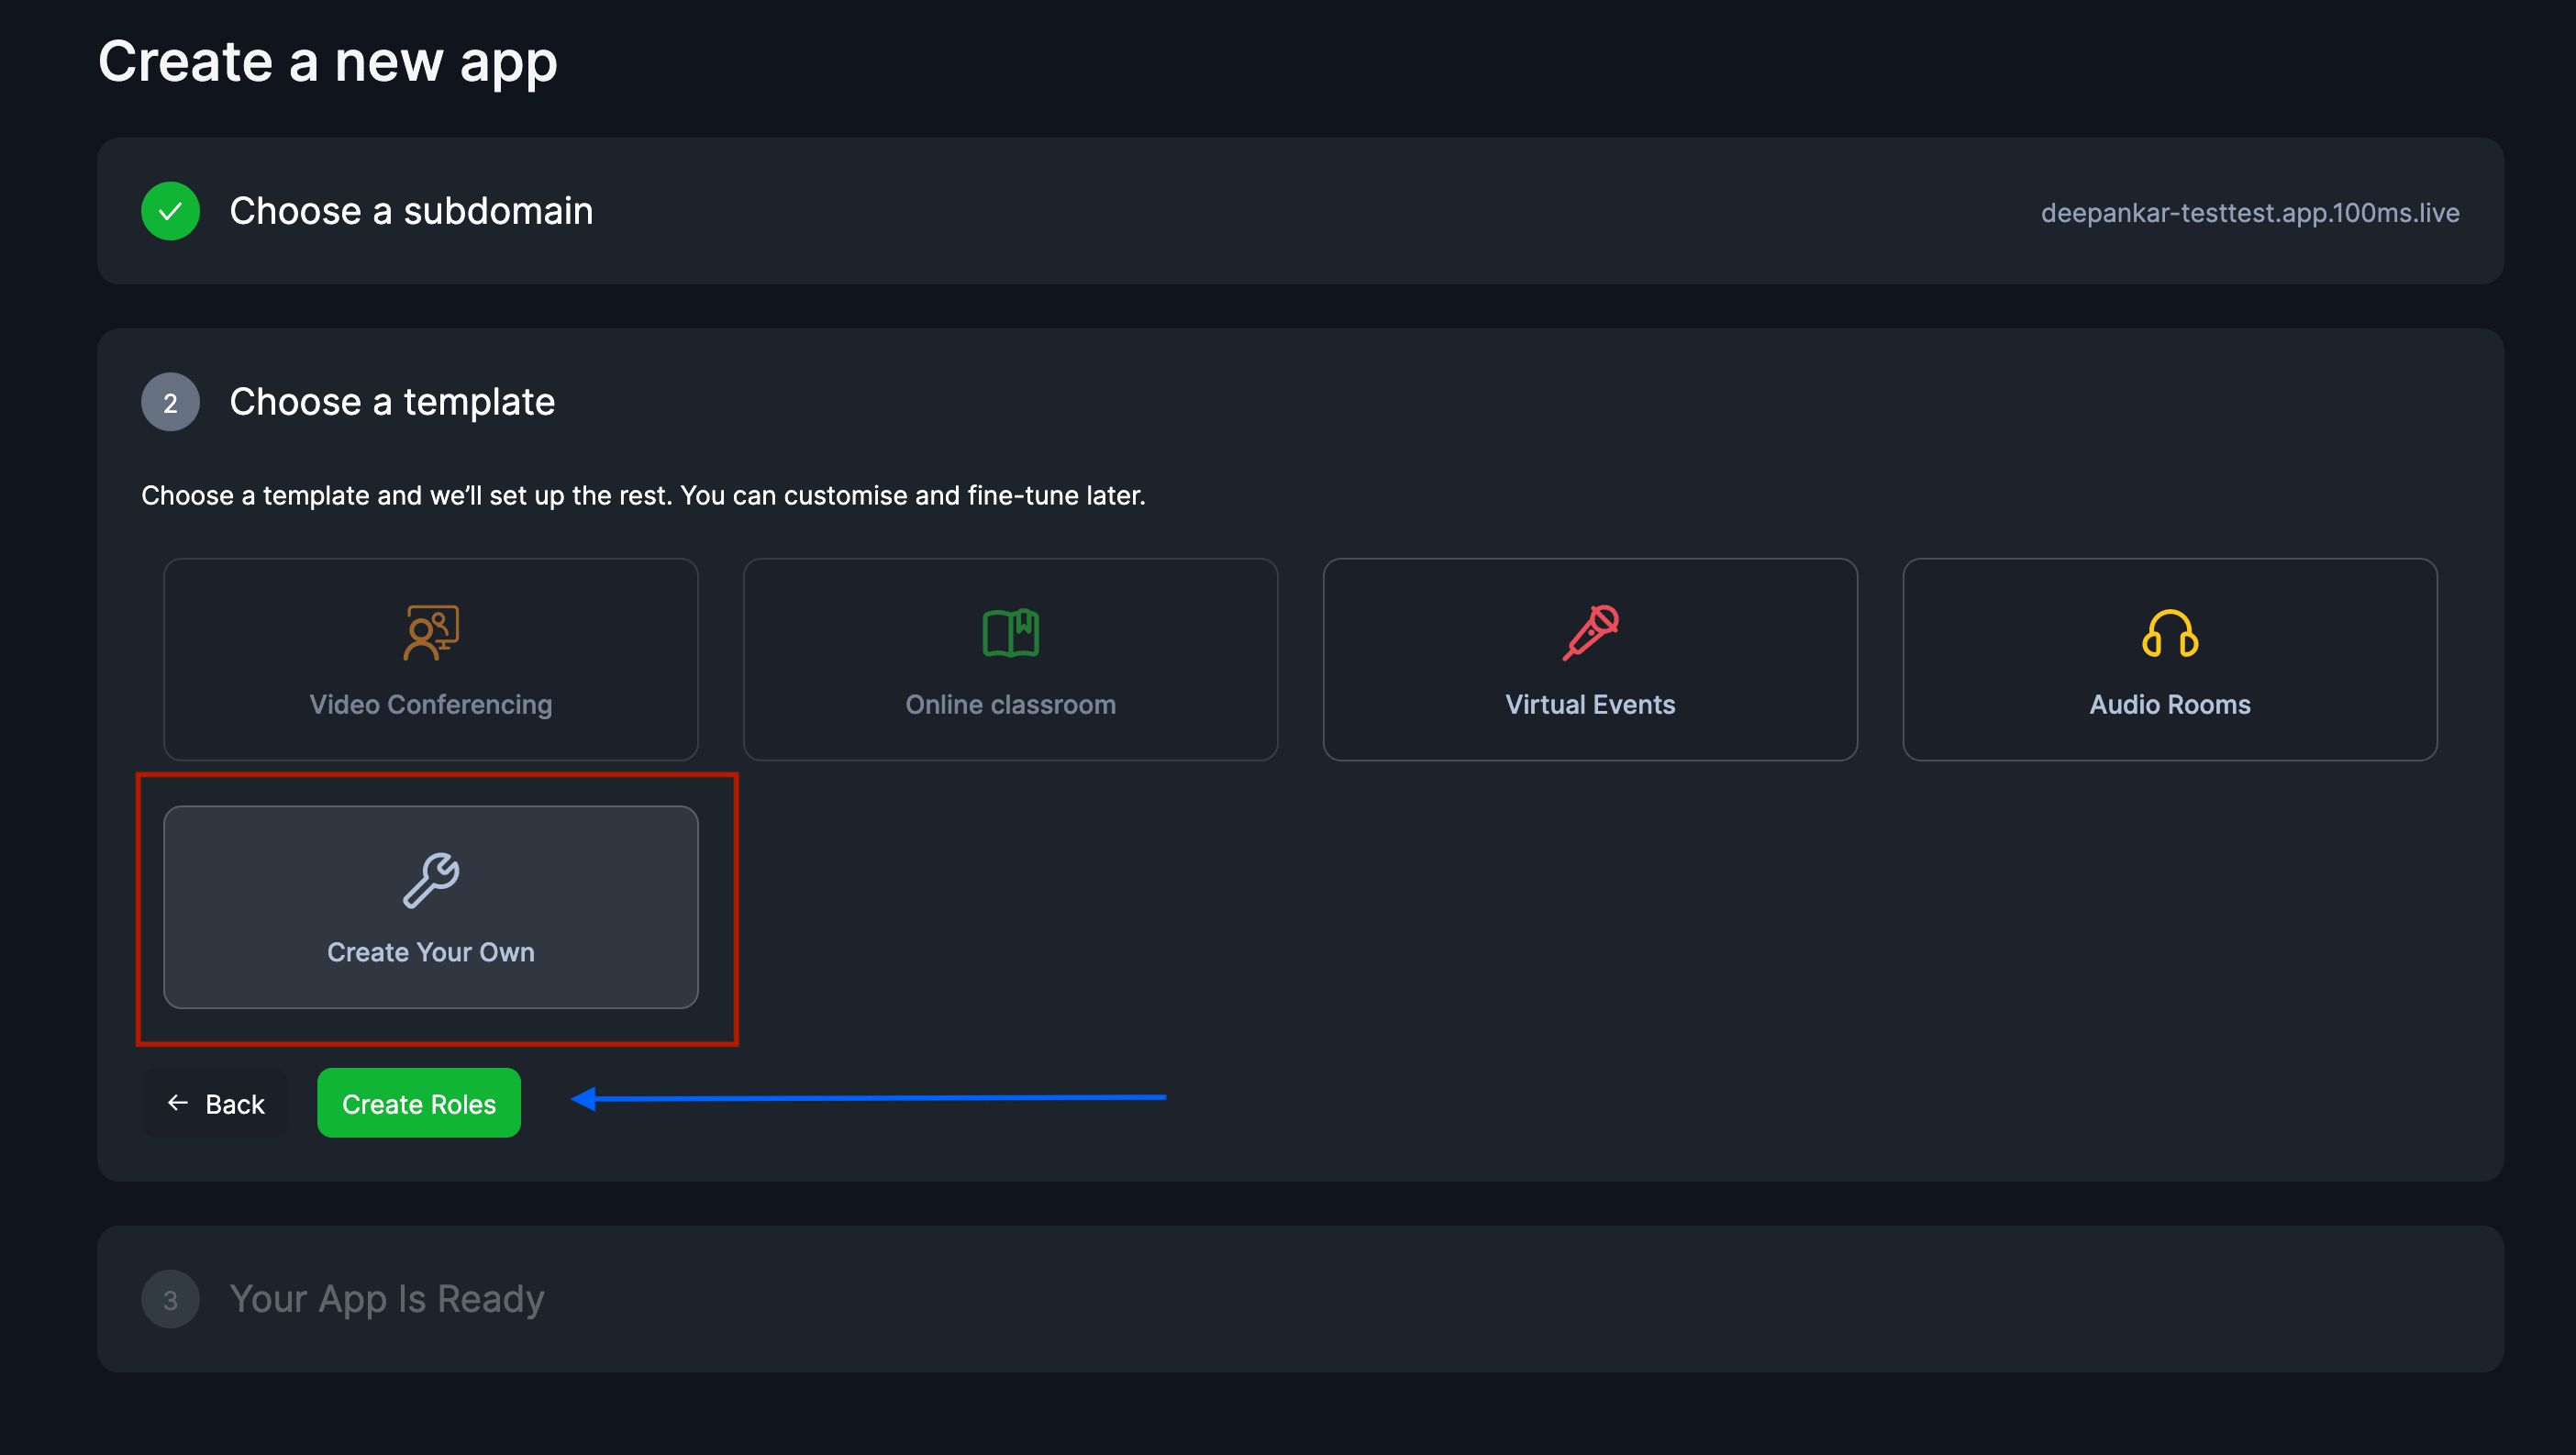
Now click on "Create Roles" button this will open a modal were we can create our custom roles.
We will be having 3 roles in our application.
listener: only able to listen others and can't unmutespeaker: able to listen and speak (unmute/mute)moderator: able to listen and speaker , and able change other's role, muting.
We will create listener's role 1st , we uncheck all publish strategies and then click on save.
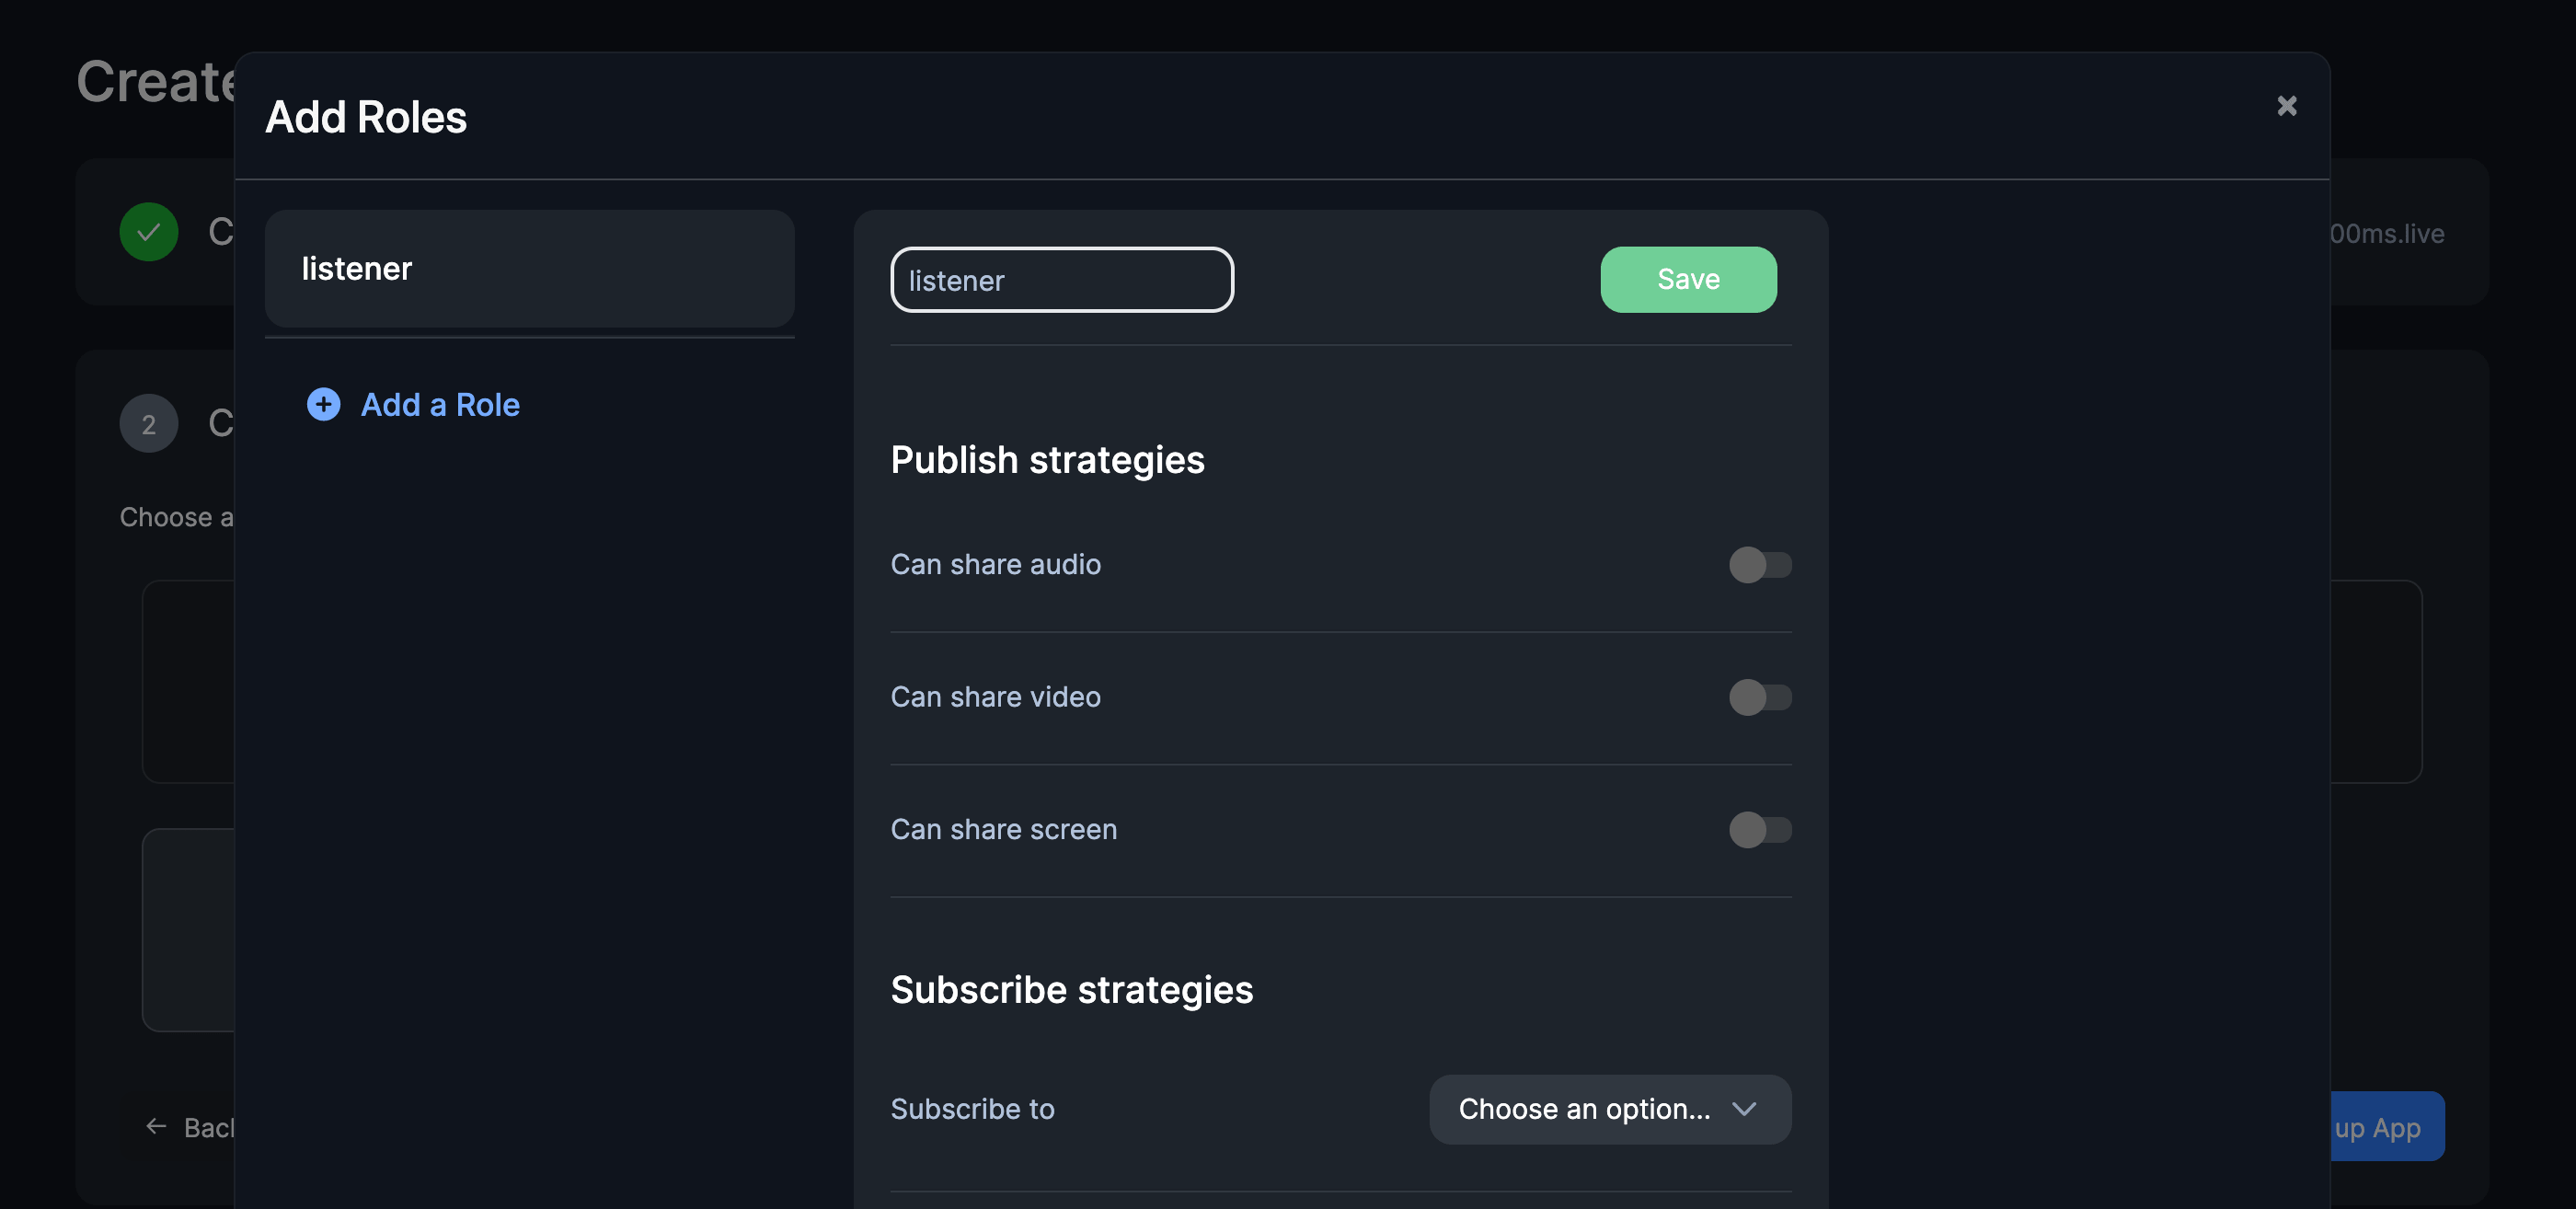
Now we will create speaker role click on "Add a new role" we will uncheck Can share video & Can share screen we will keep Can share audio checked.
For the moderator role we will do the same as speaker and also modify it's permissions by checking Can change any participant's role & Can mute any participant in the permissions sections.
Now that our roles are setup we will move on to our next step by clicking 'Set up App'. You should see your custom app being created.
Creating Room
In the last step we created our custom app and setup custom roles , in this step we will create a room_id.
To create a room head over to Create Room page in 100ms Dashboard click on "Create Room" make sure to select the Custom App that you created in the last step. Fill out Room Name and click "Create Room". After creating you will be routed to Room Details were you can find your room_id

Awesome now that we have token_endpoint and room_id we will add it in our app.
cp example.env .env
Add the token_endpoint and room_id to this .env file.
 REACT_APP_TOKEN_ENDPOINT=<YOUR-TOKEN-ENDPOINT>
REACT_APP_ROOM_ID=<YOUR-ROOM-ID>
Now we can start building our project.
Terminology
Room: A room is the basic object that 100ms SDKs return on successful connection. This contains references to peers, tracks and everything you need to render a live a/v appPeer: A peer is the object returned by 100ms SDKs that contains all information about a user - name, role, video track etc.Track: A track represents either the audio or video that a peer is publishingRole: A role defines who can a peer see/hear, the quality at which they publish their video, whether they have permissions to publish video/screenshare, mute someone, change someone's role.
Initializing the SDK
@100mslive/hms-video-react provides us a flux based reactive data store layer over 100ms core SDK.This makes state management super easy. It's core features:
- Store - The reactive store for reading data using selectors. The store acts as a single source of truth for any data related to the room.
- Actions - The actions interface for dispatching actions which in turn may reach out to server and update the store.
- Selectors - These are small functions used to get or subscribe to a portion of the store.
100ms React SDK provides 3 hooks
- useHMSActions - provides core methods to alter the state of a room
join,leave,setScreenShareEnabledetc. - useHMStore - provides a read-only data store to access the state-tree of the room eg.
peers,dominantSpeakeretc. - useHMSNotifications - provides notifications to let you know when an event occurs eg:
PEER_JOINED,PEER_LEFT,NEW_MESSAGE,ERROR.
The hmsStore is also reactive, which means any component using the HMSStore hook will re-render when the slice of the state, it listens to, changes. This allows us to write declarative code.
To harness the power of this Data Store we will wrap our entire App component around <HMSRoomProvider />.
If you open src/App.jsx you can see there's two components <Join /> and <Room /> being conditionally rendered based on isConnected variable.
- if the peer has joined the room render ->
<Room /> - if the peer hasn't joined the room render ->
<Join />
But how do we wether the peer has joined or not. This were Hms Store's hooks come in handy. By using the selectIsConnectedToRoom selector function to know if the peer has joined the room or not.
import { HMSRoomProvider, useHMSStore, selectIsConnectedToRoom, } from '@100mslive/hms-video-react';import Join from './components/Join'; import Room from './components/Room'; import './App.css'; const SpacesApp = () => {const isConnected = useHMSStore(selectIsConnectedToRoom);return <>{isConnected ? <Room /> : <Join />}</>; }; function App() { return (<HMSRoomProvider><div className='page'> <SpacesApp /> </div></HMSRoomProvider>); } export default App;
Now if we start the server with yarn start we should be able to see <Join /> being rendered because we haven't joined the room yet.
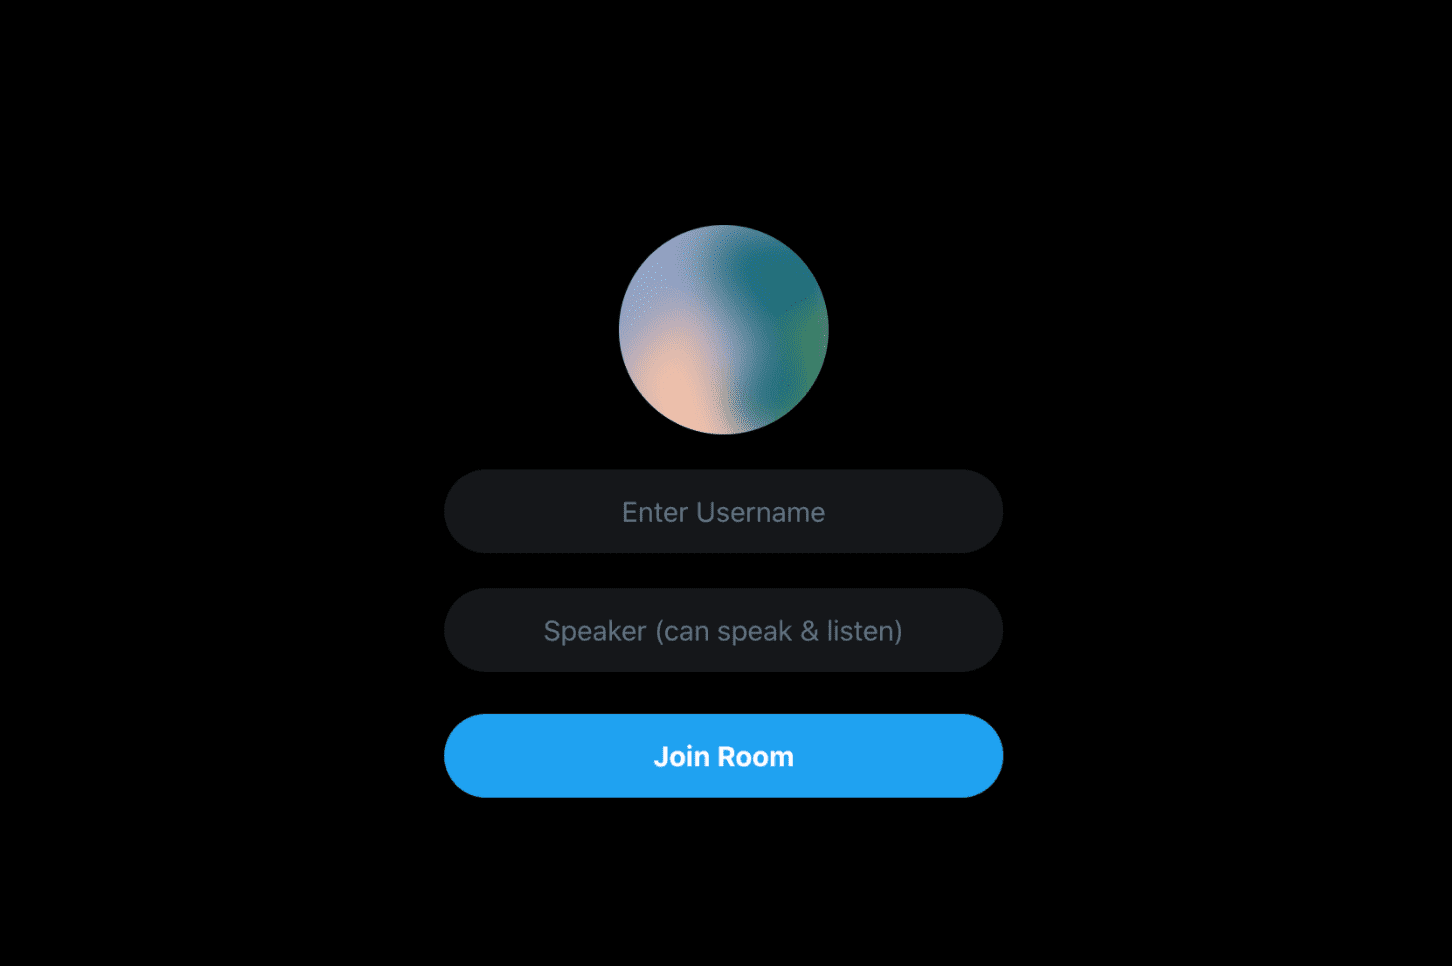
Joining Room
To join a room (a video/audio call), we need to call the join method on hmsActions and it requires us to pass a config object. The config object must be passed with the following fields:
userName: The name of the user. This is the value that will be set on the peer object and be visible to everyone connected to the room. We will get this from User's input.authToken: A client-side token that is used to authenticate the user. We will be generating this token with the helps ofgetTokenutlity function that is in theutilsfolder.
If we open /src/components/Join.jsx we can find username , role as our states that are controlled by the respective inputs. Now we have Peers's username and role let's work on generating our token.
We would generate our token whenever user clicks on "Join Button" once it is generated we will call the hmsActions.joinRoom() function and pass the token there.
We will use getToken utility function defined in src/utils/getToken.js it takes Peer's role as an argument. What it does is make a POST request to our TOKEN_ENDPOINT and returns us a Token.
⚠️ NOTE :
You must add REACT_APP_TOKEN_ENDPOINT & REACT_APP_ROOM_ID to your .env.local before this step.
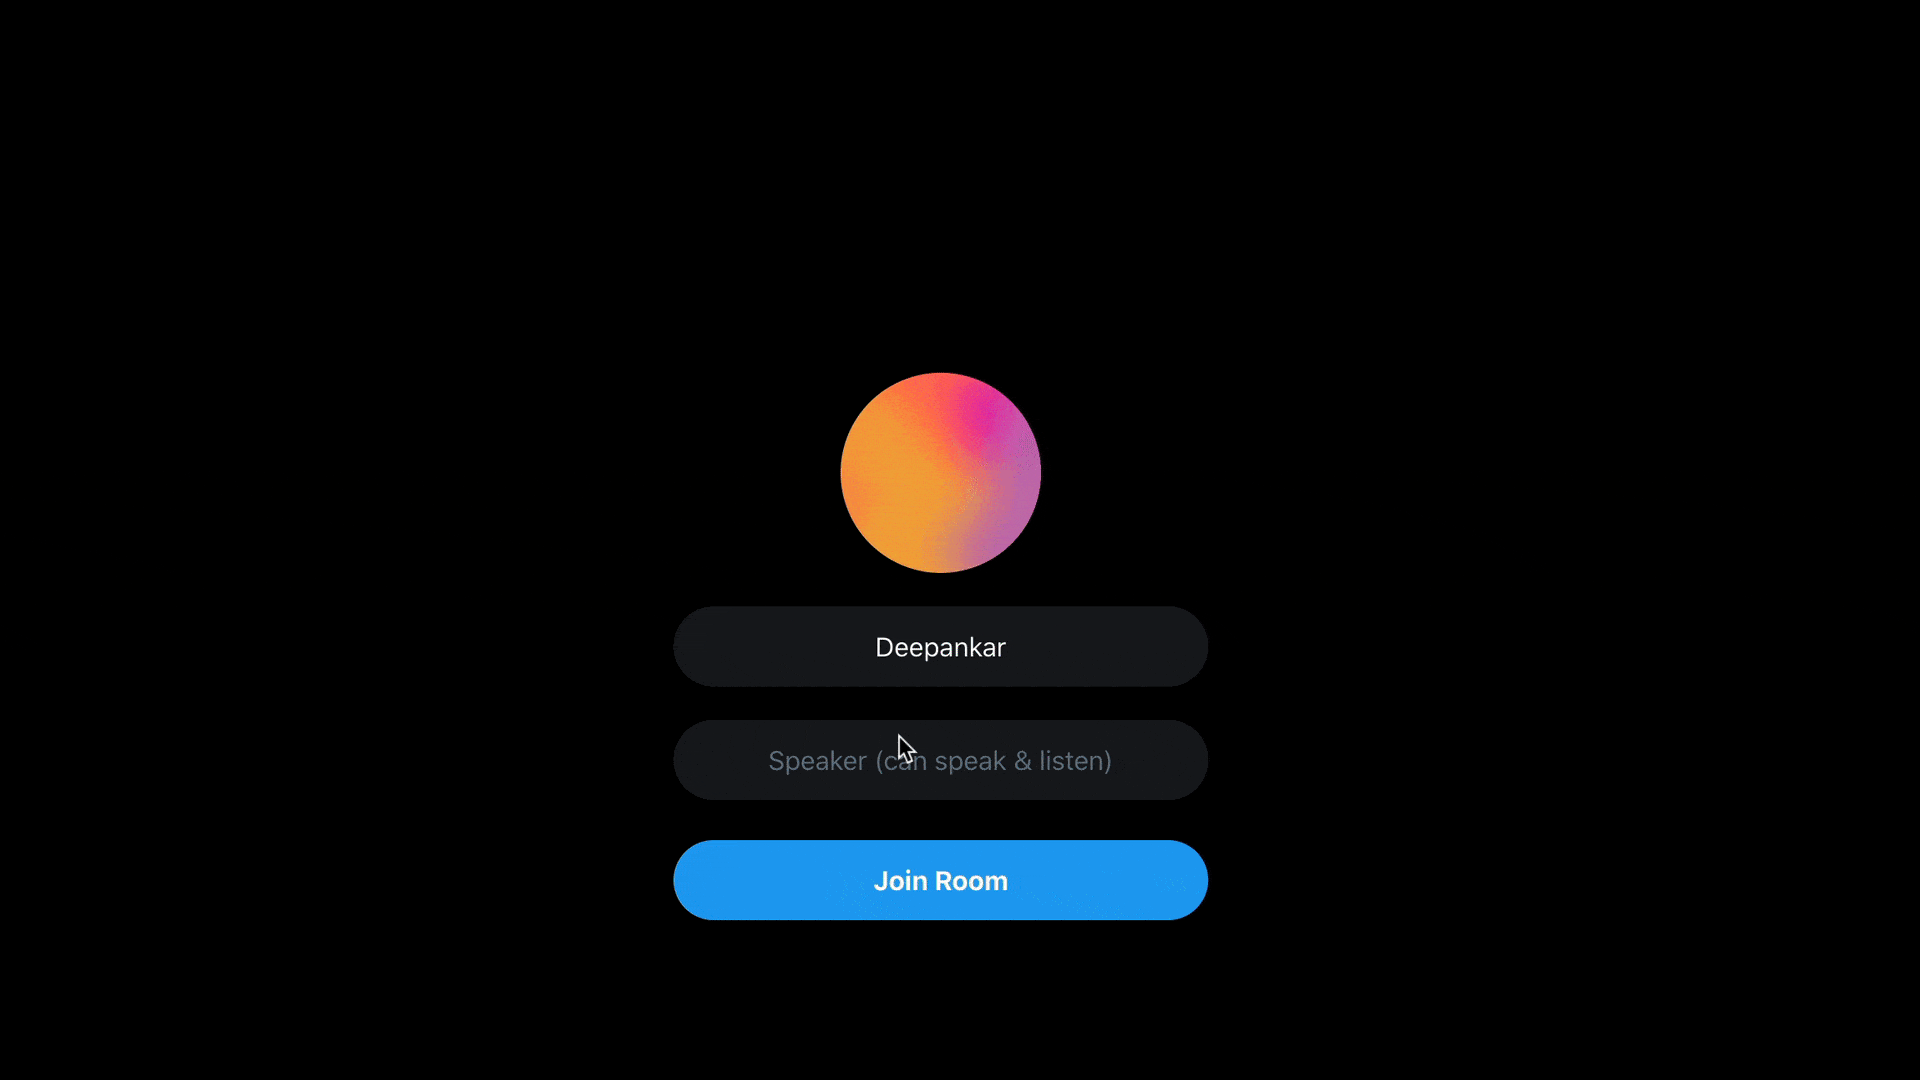
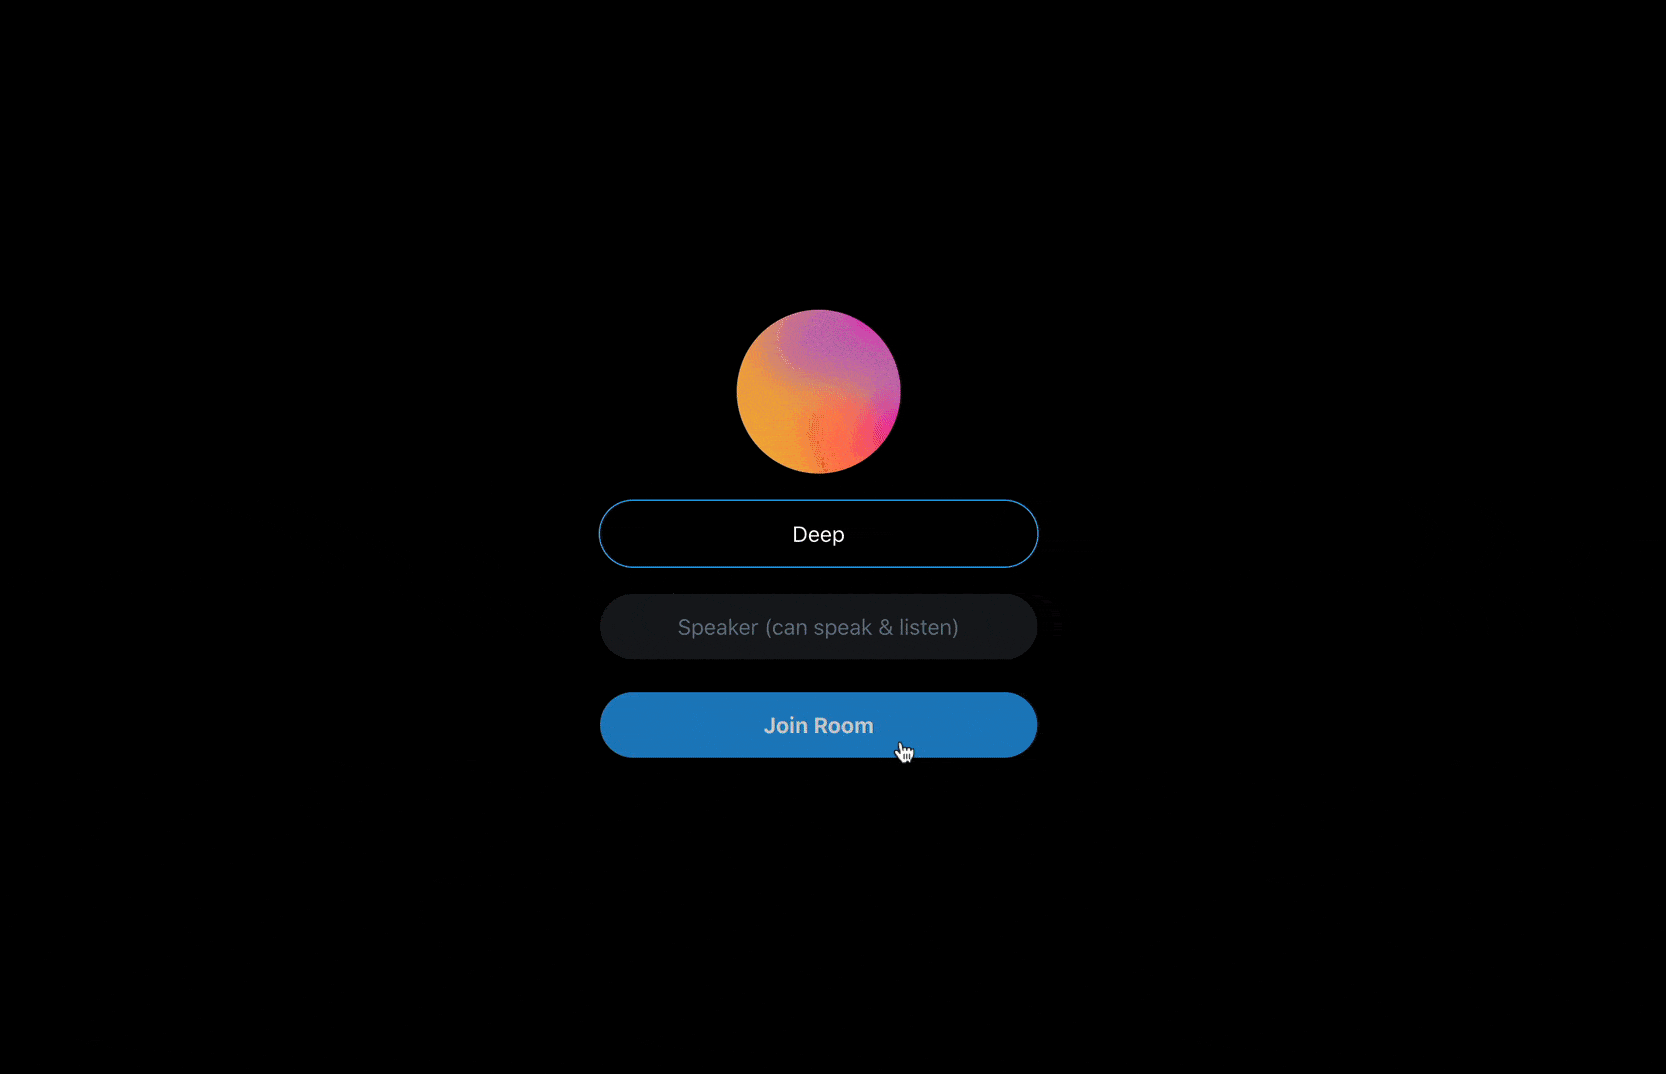
import React, { useState } from 'react'; import Input from './Join/Input'; import JoinButton from './Join/JoinButton'; import Avatar from 'boring-avatars'; import Select from './Join/Select';import getToken from '../utils/getToken';import { useHMSActions } from '@100mslive/hms-video-react';const Join = () => {const hmsActions = useHMSActions();const [role, setRole] = useState('speaker'); const [username, setUsername] = useState('');const joinRoom = () => {getToken(role).then((token) => {hmsActions.join({userName: username || 'Anonymous',authToken: token,settings: {isAudioMuted: true,},});}).catch((error) => {console.log('Token API Error', error);});};return ( <div className='flex flex-col items-center justify-center h-screen'> <Avatar size={120} name={username} /> <Input state={{ username, setUsername }} /> <Select state={{ role, setRole }} /> <JoinButton onClick={joinRoom} /> </div> ); }; export default Join;
Now if we click on Join our token would be generated after which it will call hmsActions.joinRoom() which will join us in the Room making isConnected to true and hence rendering <Room /> component.
Rendering Peers
Now that we are able to join in the Room , let's work on displaying the peers who have joined the Room. To get all peers we will use selectPeers selector function. This will return us an array of all peers in the room.
Each peer object stores the details of individual participants in the room you can refer to the interface of HMSPeer.
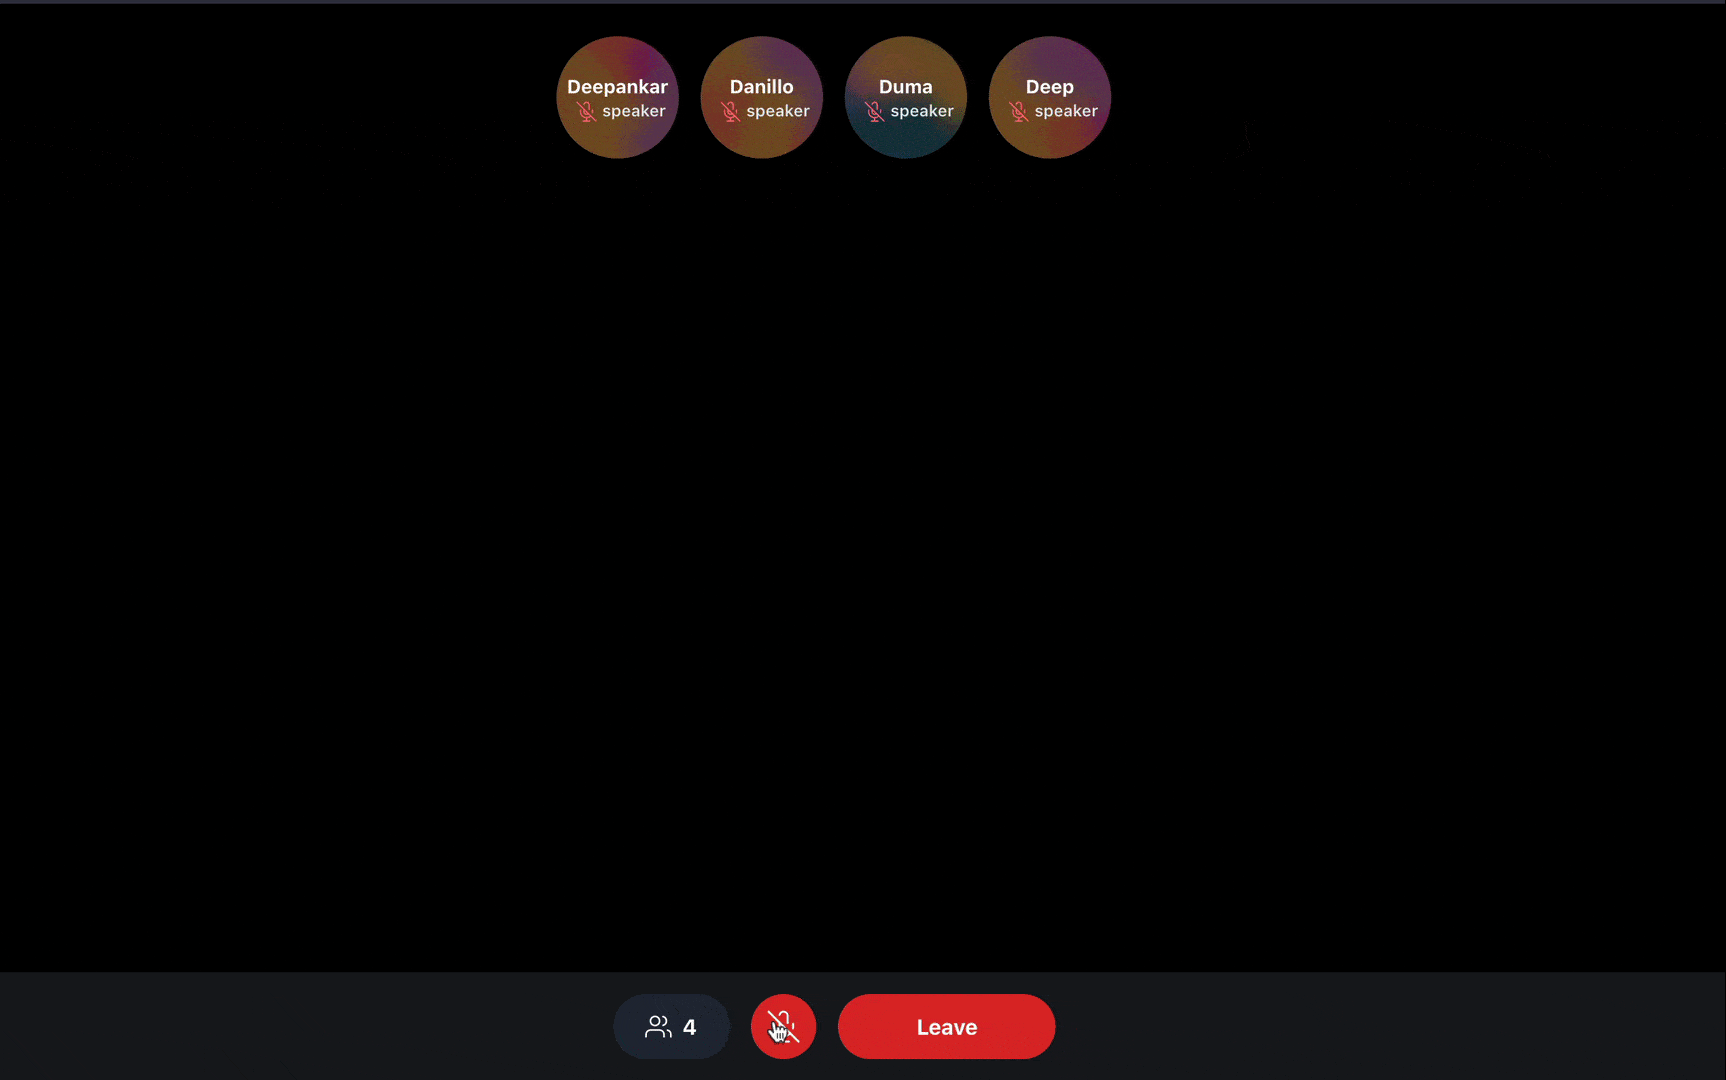
We will map these list of Peers were each peer would render <User /> component. This component takes peer as a prop which would display Peer's : username , role.
We will also import another component <Footer /> for now it's primary use would to display the number of peers in the room. We will pass peers.length in it's count prop which is total of no of peers in the room.
import { selectPeers, useHMSStore } from '@100mslive/hms-video-react';import Footer from '../components/Footer/Footer';import User from '../components/Tile/User';const Room = () => {const peers = useHMSStore(selectPeers);return ( <div className='flex flex-col pt-4'> <div className='flex justify-between items-start'> <div className='flex flex-wrap justify-center items-start w-full '>{peers.map((p) => (<User key={p.id} peer={p} />))}</div> </div><Footer count={peers.length} /></div> ); }; export default Room;
Now if you try to join from different tabs you should see all Peer's tiles being rendered with their info.
Audio Controls and Leave Room
In the last step we added the <Footer /> component which is displaying the Peer's count , Leave Room button & Audio Control but clicking on it doesn't do anything. because we haven't it functionality yet.
In this section we will add methods to leave room and be able to toggle Audio on/off. If you open Footer.jsx you can there's a variable isLocalAudioEnabled which will store the peer's audio/microphone stauts (muted/unmuted)
For the peer to leave room we call the leaveRoom function from hmsActions and to get peer's audio status we use selectIsLocalAudioEnabled selector function from the store. Now if we want to toggle this audio status we will use the method setLocalAudioEnabled from hmsActions which takes boolean value as params.
import React from 'react'; import LeaveButton from '../Buttons/LeaveButton'; import AudioButton from '../Buttons/AudioButton'; import UserCount from '../Buttons/UserCount';import { useHMSActions, useHMSStore, selectIsLocalAudioEnabled, } from '@100mslive/hms-video-react';const Footer = ({ count }) => {const hmsActions = useHMSActions();const isLocalAudioEnabled = useHMSStore(selectIsLocalAudioEnabled);return ( <footer className='flex h-20 bg-gray-100 fixed bottom-0 space-x-4 left-0 w-full items-center justify-center'> <UserCount count={count} /><AudioButton active={isLocalAudioEnabled} onClick={() => { hmsActions.setLocalAudioEnabled(!isLocalAudioEnabled); }} /><LeaveButton onClick={() => { hmsActions.leave(); }} /></footer> ); }; export default Footer;
Nown on click the Audio Button you should get a prompt to "Allow Microphone" after accepting it the button's color should change to blue based on the isLocalAudioEnabled variable.
Audio Levels and Audio Status
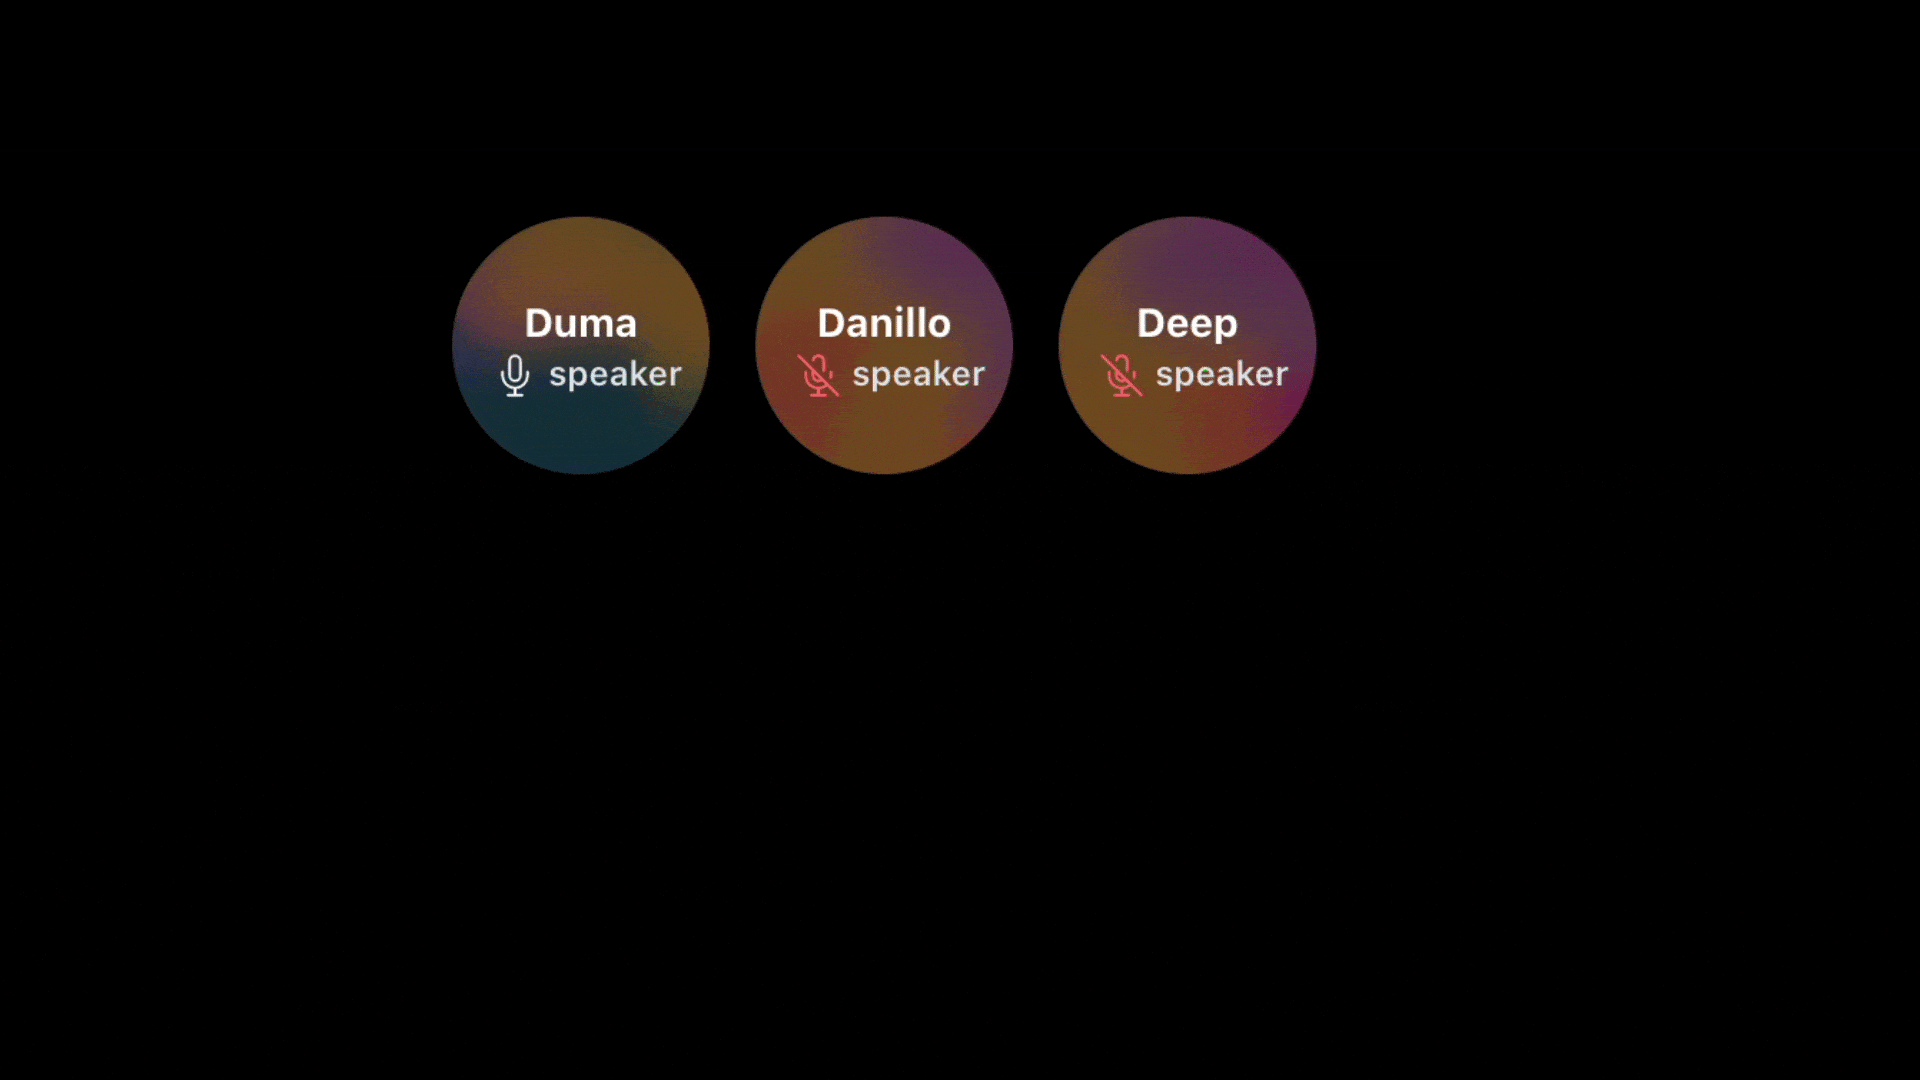
You might have observed this when we toggle our Audio Status to unmute our Audio status on the Tiles remains muted.
So how can we let other people know about our Audio Status. For this we will be using the selectIsPeerAudioEnabled selector function which takes Peer's id as an argument this returns us the audio status of the specific peer.
You should have observed this in Zoom , Meet , Clubhouse Spaces that when someone is speaking his/her Tile gets highlighted based on the intensity of the speaker's audio. You can retrieve the audio level of the peer using selectPeerAudioByID selector.
import React from 'react'; import UserTile from './UserTile'; import UserWrapper from './UserWrapper'; import UserInfo from './UserInfo';import { useHMSStore, selectPeerAudioByID, selectIsPeerAudioEnabled, } from '@100mslive/hms-video-react';const User = ({ peer }) => {const level = useHMSStore(selectPeerAudioByID(peer.id)) || 0;const audioEnabled = useHMSStore(selectIsPeerAudioEnabled(peer.id));return ( <UserTile><UserWrapper level={level}><UserInfo audioEnabled={audioEnabled} peer={peer} /></UserWrapper></UserTile> ); }; export default User;
Change Roles
Suppose you invite someone to speak in your audio room and then things get out of hands the person starts speaking about something really absurd. This is when muting the speaker or demoting it to listener role comes in action.
To invoke the changeRole API we need the follwing things:
remotePeerId: The remote peer ID whose role you want to change.toRoleName: The target role name.force: Whether you want to change their role without asking them or give them a chance to accept/reject.
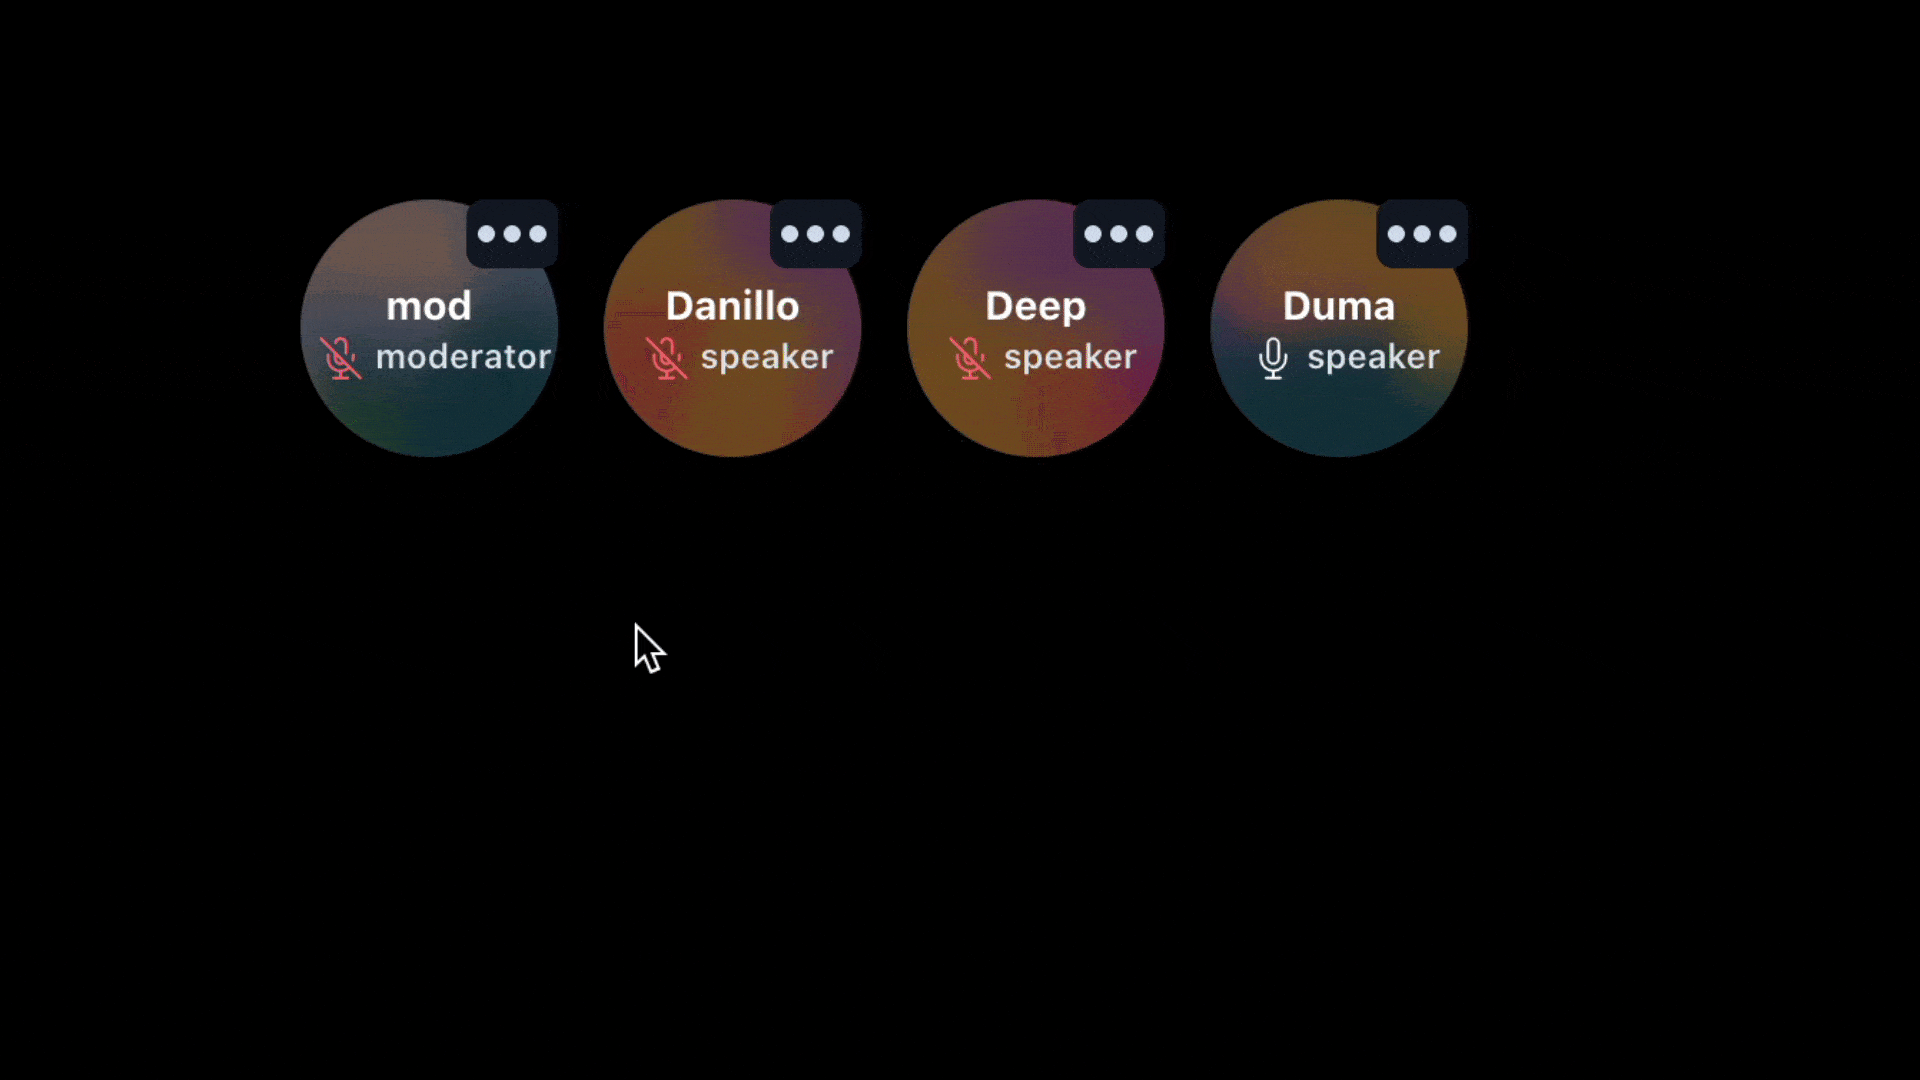
If you open Roles.jsx you can find the boiler plate mutePeer and changeRole functions added along with the UI components.
import React from 'react'; import MenuIcon from '../../icons/MenuIcon';import { useHMSActions } from '@100mslive/hms-video-react';const Permission = ({ audioTrack, id }) => {const hmsActions = useHMSActions();const mutePeer = () => {hmsActions.setRemoteTrackEnabled(audioTrack, false);};const changeRole = (role) => {hmsActions.changeRole(id, role, true);};const btnClass = 'flex w-32 text-sm font-semibold hover:bg-gray-800 p-2'; return ( <div className='absolute right-0 top-0 menu-btn z-50'> <div as='button' className='bg-gray-900 rounded-md px-1 relative group'> <MenuIcon /> </div> <div className='menu-items py-2 flex-col bg-gray-900 text-gray-500 rounded-md'> <button className={btnClass} onClick={() => mutePeer()}> Mute </button> <button className={btnClass} onClick={() => changeRole('listener')}> Make Listener </button> <button className={btnClass} onClick={() => changeRole('speaker')}> Mute Speaker </button> </div> </div> ); }; export default Permission;
We should only show <Permission /> to peers with roles name as 'moderator'.
import React from 'react'; import UserTile from './UserTile'; import UserWrapper from './UserWrapper'; import UserInfo from './UserInfo';import { useHMSStore, selectPeerAudioByID, selectIsPeerAudioEnabled, selectPermissions, } from '@100mslive/hms-video-react';import Permission from '../Roles/Roles';const User = ({ peer }) => { const level = useHMSStore(selectPeerAudioByID(peer.id)) || 0;const audioEnabled = useHMSStore(selectIsPeerAudioEnabled(peer.id));const canMute = useHMSStore(selectPermissions).mute || false; return ( <UserTile>{canMute ? (<Permission id={peer.id} audioTrack={peer.audioTrack} />) : null}<UserWrapper level={level}> <UserInfo audioEnabled={audioEnabled} peer={peer} /> </UserWrapper> </UserTile> ); }; export default User;
if you have joined with the "moderator" role you should abe able to change roles of "listeners" and "speakers"
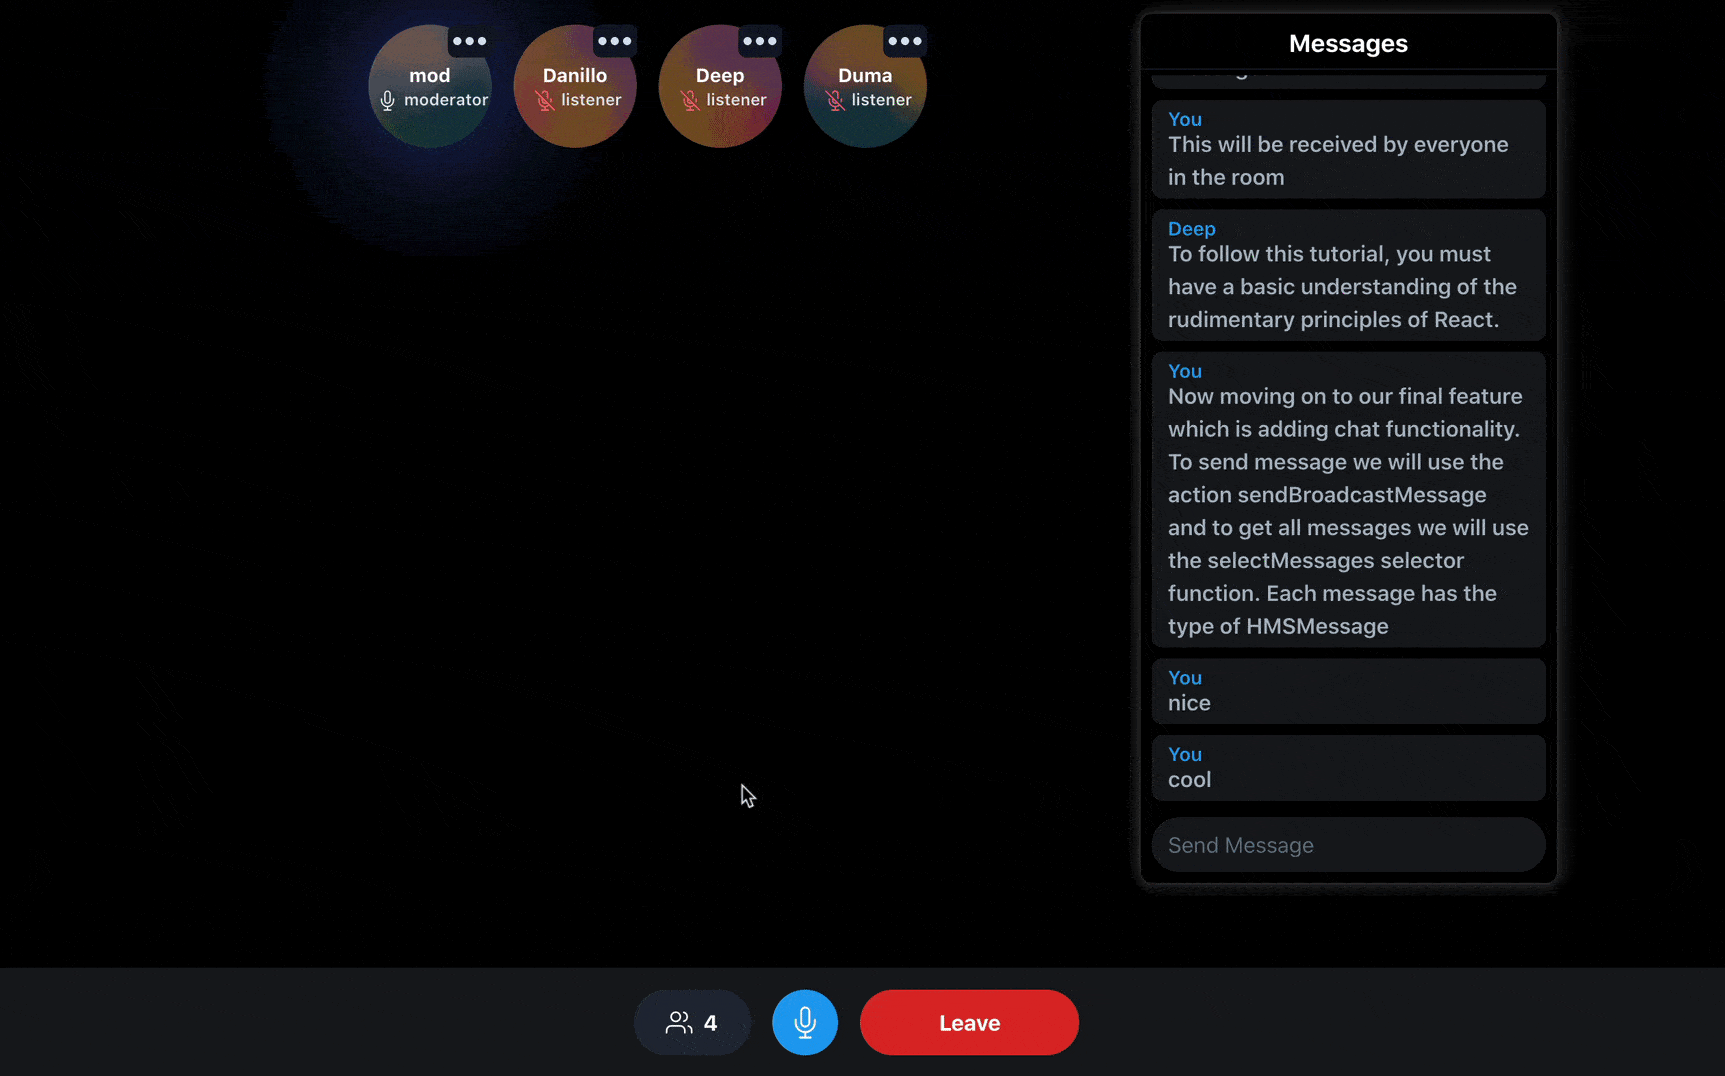
Send messages
Now moving on to our final feature which is adding chat functionality. To send message we will use the action sendBroadcastMessage and to get all messages we will use the selectMessages selector function. Each message has the type of HMSMessage you can refer it's interface here
If you open ChatContainer.jsx you can see all UI components setup there , we will add sendBroadcastMessage inside the sendMessage function which gets on input keypress event.
import { useHMSStore, selectHMSMessages, useHMSActions, } from '@100mslive/hms-video-react';import React from 'react'; import ChatFeed from './ChatFeed'; import ChatInput from './ChatInput'; import ChatLayout from './ChatLayout';import Chat from './Chat';const ChatContainer = () => {const hmsActions = useHMSActions();const storeMessages = useHMSStore(selectHMSMessages);const [chatInput, setChatInput] = React.useState('');const sendMessage = () => {hmsActions.sendBroadcastMessage(chatInput);setChatInput('');};React.useEffect(() => {const el = document.getElementById('chat-feed');if (el) {el.scrollTop = el.scrollHeight;}}, [storeMessages]);return ( <ChatLayout> <ChatFeed>{storeMessages.map((m) => (<Chat key={m.id} msg={m} />))}</ChatFeed> <ChatInput value={chatInput} onChange={(e) => setChatInput(e.target.value)} onKeyPress={() => { sendMessage(); }} /> </ChatLayout> ); }; export default ChatContainer;
Now let's render <ChatContainer /> in <Room /> component.
import { selectPeers, useHMSStore } from '@100mslive/hms-video-react'; import Footer from '../components/Footer/Footer'; import User from '../components/Tile/User';import ChatContainer from './Chat/ChatContainer';const Room = () => { const peers = useHMSStore(selectPeers); return ( <div className='flex flex-col pt-4'> <div className='flex justify-between items-start'> <div className='flex flex-wrap justify-center items-start w-full '> {peers.map((p) => ( <User key={p.id} peer={p} /> ))} </div><ChatContainer /></div> <Footer count={peers.length} /> </div> ); }; export default Room;